
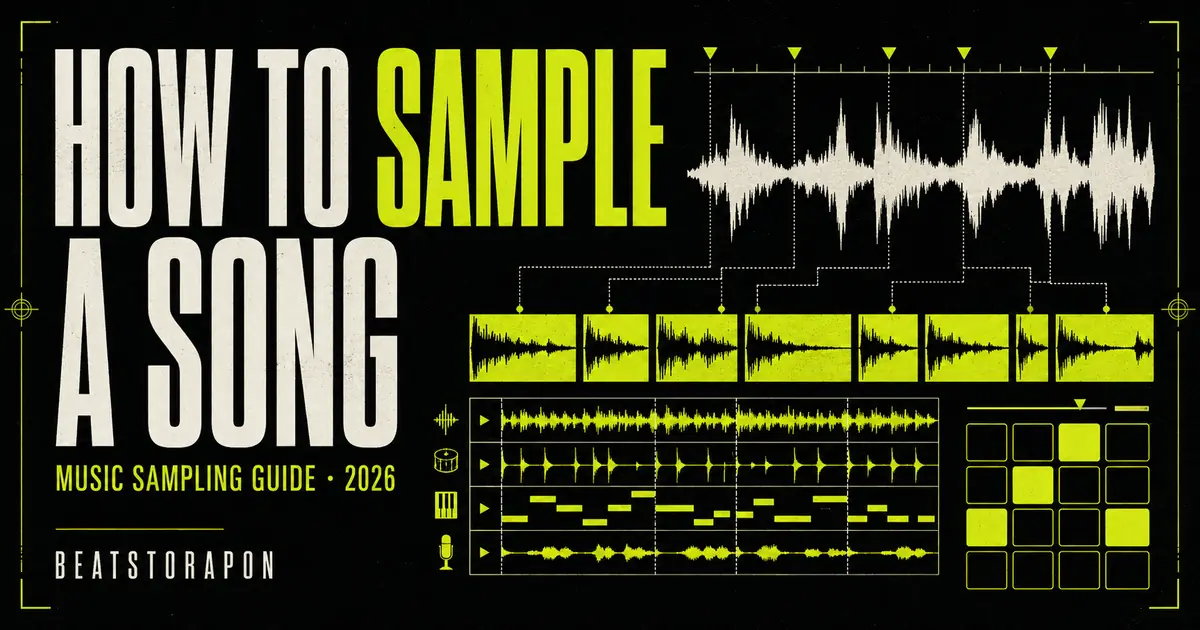
The complete producer workflow · Updated July 2026
Music Sampling: How to Sample a Song in 2026
Turn a finished song into a clean vocal phrase, drum break, bass line or melodic chop—then tune it, time it, flip it and build a new beat without losing the groove that made you reach for it.
Quick answer
How to sample a song
To sample a song, choose a legally usable recording, isolate the part you want, identify its BPM and key, trim it cleanly, time-stretch and pitch it to your project, chop it into playable slices, rearrange the slices, then mix the result around your drums and bass. If the element is buried inside a finished stereo mix, split the song into vocals, drums, bass and other instruments first.
The technical part is no longer the bottleneck. A modern stem splitter can pull useful musical layers out of a mixed track in minutes. The real work is choosing a section with character and transforming it into a part that serves your record.
A good sample does not have to be obscure. It has to be usable: a clear rhythmic identity, enough space to edit, a tone that survives pitching, and a legal path that fits what you plan to do with the finished beat.
The foundation
What is sampling in music?
Music sampling is the reuse of recorded sound inside a new piece of music. A producer may lift one kick, loop two bars of guitar, turn a sung syllable into a playable instrument, or chop a complete phrase into a rhythm that never existed in the source.
Sampling is different from interpolation. A sample reuses audio from an existing sound recording. An interpolation re-performs part of the underlying composition without copying the original master recording. That distinction matters creatively and legally because a song and a particular recording of that song are separate copyrighted works, as the U.S. Copyright Office explains.
| Method | What you reuse | Example | Main implication |
|---|---|---|---|
| Sampling | Audio from a sound recording | Chopping two seconds from an existing record | The master recording and underlying composition may both be involved |
| Interpolation | A re-performed melody, lyric or musical phrase | Replaying a bass line with your own instrument | The original recording is not copied, but composition rights can still matter |
| Cover | A substantial performance of the original song | Recording your own version of a complete song | Different licensing path from sampling |
| Sound design | Audio you created or licensed for manipulation | Turning a door slam into a snare | Usually simpler if you own the recording |
The line between a lazy loop and an original flip is not the number of effects you add. It is whether your choices create a new musical function. Moving the downbeat, changing the chord context, resequencing syllables, replacing the groove and building tension around different moments can transform the role of the source without burying it under processing.
Choose the right raw material
Six types of samples producers use
Melodic loop
A complete phrase repeated over several bars. Fast to build around, but it needs arrangement changes so the record does not feel static.
Micro-chops
Short fragments mapped across pads or keys. The source becomes a new performance rather than a background loop.
Vocal sample
A word, breath, ad-lib or melodic phrase used as a hook, texture, call-and-response part or playable vocal instrument.
Drum break
A rhythmic passage chopped into hits, looped whole or layered under new drums to add movement and human timing.
Single hit
One kick, snare, stab, note or effect triggered as an instrument. One-shots are easy to rearrange and tune precisely.
Atmosphere
Room tone, vinyl noise, crowd sound, field recording or an instrument tail that gives the beat a physical environment.
Start by deciding what job the sample should do. A hook needs memorability. A drum layer needs transient shape. A texture needs width and motion. A one-shot needs clean boundaries. That decision tells you what to isolate and how aggressively to chop it.
The complete workflow
How to sample a song step by step
This workflow works in FL Studio, Ableton Live, Logic Pro, GarageBand and most modern DAWs. The buttons move; the decisions do not.
-
Start with a production idea
Do not begin by dragging random audio into a session. Define the role first: “I need a dusty four-bar chord bed,” “I want a chopped vocal hook,” or “this groove needs a live drum pocket.” A narrow brief makes listening faster because you know what to reject.
Set a rough tempo and create an eight-bar drum pattern before you browse. The beat gives every candidate a context. A phrase that sounds ordinary alone may become perfect against the right kick pattern.
-
Choose a source you can actually use
The safest sources are audio you recorded, sample packs whose license covers your intended release, commissioned performances, public-domain recordings, or material licensed for reuse under terms you have read and saved. The Library of Congress Citizen DJ collection, for example, offers thousands of free-to-use sounds with collection-specific guidance.
If you want to practice with a commercial recording, keep the experiment private until the rights question is resolved. Changing the pitch, chopping the audio or using only a short piece does not automatically make an uncleared sample safe.
-
Split the source into stems
A stereo master locks vocals, drums, bass and instruments together. If you sample it whole, every edit also drags along the kick, vocal bleed and chord changes you did not want. Stem separation gives you a cleaner starting point.
- Open the BeatsToRapOn AI Stem Splitter.
- Upload the highest-quality file you are permitted to use.
- Choose the separation that matches the target element.
- Preview the vocal, drum, bass and instrumental results.
- Download only the stem that contains the musical idea.
Stem separation is not the final sound. It is source preparation. Small traces from the original mix often disappear once the sample is chopped, filtered, layered and placed behind new drums.
-
Find the original BPM and key
Knowing the source tempo lets you stretch accurately instead of nudging by ear for twenty minutes. Knowing the key tells you how far the sample must move to sit with your bass and melodies.
Upload the source or isolated stem to the Song Key & BPM Finder, then write the result in the clip name:
vocal_96bpm_Fmin.wav. If the detector is uncertain, tap the tempo, test half-time and double-time values, and confirm the key against a keyboard.Tempo stretch ratio = target BPM ÷ source BPM. Moving a 96 BPM phrase to 120 BPM requires a ratio of 1.25, or 125% of its original tempo. -
Find the strongest moment—not just the cleanest
Listen for the point with emotional gravity: a chord resolving, a singer inhaling before a word, a drummer pushing ahead of the grid, or a note whose tail changes color. Character beats technical perfection.
Mark several candidates. Keep one loop, three to six short chops, and at least one odd fragment such as a breath or tail. The “mistake” often becomes the transition that gives the flip identity.
-
Trim on musical boundaries
Zoom to the waveform and move the start point close to a zero crossing when possible. Add a tiny fade at the beginning and end to prevent clicks. For loops, check the seam in solo and against the drums; a loop can be mathematically exact and still feel late if the first transient is not the musical downbeat.
Leave a little pre-transient air when the sample contains a pick, breath or drum attack. Cutting exactly at the loudest peak can make the sound feel unnaturally clipped.
-
Time-stretch before you over-process
Match the clip to the project tempo while the audio is still easy to judge. Use a rhythmic or transient mode for drums and a tonal or complex mode for full phrases and vocals. Extreme stretching can create grain, wobble and smeared transients; sometimes that texture is the point, but make it a decision.
If the sample still drifts after entering the correct BPM, the original performance may not follow a fixed grid. Place warp markers at the start of major phrases rather than quantizing every transient. Preserve some internal push and pull.
-
Tune the sample to the beat
Transpose in semitones until the sample supports the project key. Start with the shortest move: if the sample is in F minor and the beat is in G minor, try +2 semitones. An octave is 12 semitones, so ±12 changes register while retaining the pitch class.
Do not trust the key label more than your ears. Samples can contain borrowed chords, ambiguous thirds or bass notes that imply a different root. Solo the bass and sample together; if their low notes fight, change the sample pitch, the bass note or the chop.
-
Chop by transients, beats—or meaning
Automatic transient slicing is a useful first pass, not a creative decision. Move markers to the places that matter musically. For a vocal, slice by syllable and consonant. For chords, slice before attacks so each pad includes the full transient. For drums, isolate the kick, snare and ghost notes.
Create fewer chops than you think you need. Eight deliberate pieces are easier to perform than forty nearly identical fragments. Map them across pads, play a new rhythm, then edit the MIDI performance rather than drawing the “correct” order immediately.
-
Build a new sequence and arrangement
Write a two-bar answer to the source rather than replaying it exactly. Move the first chop away from beat one, repeat a short fragment as a pickup, leave a gap for the snare, or turn the final note into the beginning.
Then create at least three arrangement states:
- Full: the main sample pattern with drums and bass.
- Reduced: one chop, filtered loop or texture for verses.
- Release: a reversed tail, vocal fragment or stop for transitions.
A sample-based beat becomes a song when the listener can feel sections changing without the central idea disappearing.
-
Mix around the sample
High-pass only as far as the arrangement requires. A thin sample leaves room for bass but can lose the warmth that made it valuable. Use subtractive EQ to create pockets for the kick, snare and vocal, then compress only if the dynamics are fighting the groove.
For residual stem artifacts, try a narrow cut, a short room reverb, saturation, mono below the low mids, or layering the sample quietly under a cleaner instrument. Do not chase perfect isolation at the cost of musical energy.
Decision guide
Should you loop, chop or replay it?
| If the source has… | Best first move | Why |
|---|---|---|
| A complete phrase with a strong pocket | Loop it | Preserves the performance and gets the beat moving quickly |
| Great sounds but awkward chord changes | Micro-chop it | Lets you rebuild harmony and rhythm from smaller pieces |
| A recognizable melody you can perform | Interpolate it | Creates more control over tone, tempo and arrangement; composition rights can still apply |
| One useful element buried in a full mix | Split stems first | Reduces competing vocals, drums or bass before editing |
| Heavy artifacts after separation | Use a shorter chop or layer | Brief events hide artifacts better than exposed sustained notes |
DAW quick starts
How to sample in FL Studio, Ableton and Logic
Prepare the audio with the ten-step workflow above, then use the shortest path inside your DAW.
How to sample a song in FL Studio
- Drag the isolated stem or licensed sample into the Playlist.
- Set the sample tempo and stretch it to the project.
- Add Slicex to the Channel Rack.
- Drag the audio into Slicex and use transient detection as a starting point.
- Move, add or delete slice markers so each region begins musically.
- Trigger the slices from the Piano roll and record a new sequence.
- Route Slicex to the Mixer for EQ, saturation, delay and reverb.
Image-Line’s official documentation confirms that Slicex detects beats, makes slices independently playable and supports reordering and time-stretching. For one-shots, the simpler Channel Sampler may be faster than Slicex.
How to sample a song in Ableton Live
- Drag the audio onto an Audio Track and switch Warp on.
- Set the first downbeat and correct the source tempo.
- Crop the clip to the phrase you want.
- Right-click the clip and choose Slice to New MIDI Track.
- Slice by transients for free timing or by a beat division for grid-based chops.
- Resequence the generated MIDI notes and edit each Simpler instance as needed.
Ableton’s Live 12 manual describes how Slice to New MIDI Track creates a MIDI clip and a Drum Rack with one playable chain per slice.
How to sample a song in Logic Pro
- Create a Software Instrument Track and load Quick Sampler.
- Drag your sample into the waveform display.
- Choose Original to preserve the file or Optimized for automatic setup.
- Select Slice mode and adjust the transient markers.
- Enable Flex and Follow Tempo when the phrase must track the project tempo.
- Play the slices from MIDI, or convert them into a Drum Machine Designer track.
Apple’s current Quick Sampler guide documents its Classic, One Shot and Slice modes, plus Flex-based pitch and tempo control.
Make the flip yours
Nine sampling techniques that create new music
1. Change the implied downbeat
Start the phrase from beat two, the “and” of four, or the final note. The same audio feels completely different when the listener hears another event as beat one.
2. Alternate forward and reversed chops
Reverse only the pickup or tail, not the entire loop. A reversed breath before a forward word can create a natural swell without announcing the effect.
3. Resample at a different pitch
Pitch the sample, bounce it, then pitch the bounced file again. Each generation changes the transient and texture. This is especially effective on vocals, keys and strings.
4. Separate rhythm from tone
Use one copy for the rhythmic attack and another for sustained tone. High-pass the attack layer, low-pass or blur the tonal layer, and arrange them independently.
5. Build a new chord from one note
Isolate a clean pitched fragment, load it as a one-shot and play it chromatically. A single horn, vocal vowel or guitar harmonic can become a complete instrument.
6. Gate a sustained stem with a new groove
Take a long vocal or instrument stem and use volume automation, a trance gate or sidechain trigger to impose a rhythm unrelated to the original performance.
7. Keep the human timing
Quantize the first chop and leave the inner notes loose. The beat stays anchored while the source retains its push, drag and breath.
8. Use call and response
Let the sample occupy one half of the bar and answer it with a synth, bass, vocal or different chop. Space turns repetition into conversation.
9. Make the sample disappear
For one section, remove the recognizable phrase but leave its reverb return, reversed tail or one filtered chop. The listener still feels the motif without hearing the full loop again.
Release it without guessing
How to sample a song legally
The production workflow and the permission workflow are separate. A stem splitter can isolate audio; it does not grant permission to release that audio.
Copyright rules vary by country, contract and use. The practical starting point is that a commercial song can contain two distinct rights: the musical composition and the sound recording. The World Intellectual Property Organization’s review of music sampling describes how sampling can involve permission for both.
The composition
The melody, harmony, rhythm and lyrics. This is commonly controlled by songwriters and publishers.
The sound recording
The fixed recorded performance—the master. This is commonly controlled by the artist, producer or label.
A practical sample-clearance checklist
- Identify the exact source. Record title, performer, version, release and the sampled time range.
- Confirm what you copied. Did you use the master audio, replay the composition, or both?
- Find the relevant rights holders. Credits, label information and publishing databases are starting points, not proof of authority.
- Prepare the usage details. Include sample duration, how often it appears, territory, release format, expected release date and an audio preview.
- Request written permission. Do not treat silence or a social-media message as a license.
- Review the terms. Check fees, royalty splits, credit language, territory, duration, media and whether future remixes are covered.
- Keep the signed documentation. Store it with the project files and distributor records.
There is no universal “safe number of seconds.”
The U.S. Copyright Office says there is no legal rule permitting a fixed number of words, musical notes or percentage of a work. Fair use depends on the circumstances, and changing someone else’s work does not automatically make it yours. Read the Office’s fair-use FAQ and get qualified advice for an important release.
Lower-friction alternatives to uncleared sampling
- Record your own source audio.
- Commission a musician or vocalist under a clear written agreement.
- Use a reputable library and save the license that applied when you downloaded the file.
- Use public-domain or openly licensed audio after checking the item’s rights statement.
- Interpolate the musical idea and clear any composition rights that still apply.
Do not assume a sound is cleared because it came bundled with software. Image-Line, for example, distinguishes commercial-use content from restricted demo-project material in its official FL Studio copyright guide. Read the license for the exact source.
Automated platform detection is also separate from legal clearance. YouTube explains that its Content ID system scans uploads for matches and can apply a claim according to the rights holder’s settings. A file passing one upload today is not permission and does not guarantee another service will treat it the same way. See YouTube’s explanation of copyright claims.
This section is general educational information, not legal advice. Copyright law and licensing practice vary by jurisdiction and facts.
Fix the sound, not the theory
Music sampling troubleshooting
| What you hear | Likely cause | Best first fix |
|---|---|---|
| Clicks at chop boundaries | Cut away from a zero crossing or no fade | Add 2–10 ms fades and move the marker slightly |
| Loop feels late | Downbeat marker is after the true attack | Move the start earlier; preserve pre-transient air |
| Sample drifts off grid | Wrong source BPM or live tempo movement | Check half/double time and warp by phrase |
| Vocal sounds metallic | Stem artifacts or excessive stretching | Use a shorter phrase, gentler stretch or supporting layer |
| Bass and sample clash | Conflicting roots or low-frequency overlap | Retune, change the bass notes or filter only the conflicting band |
| Beat sounds like the original | Same start point, order and harmony | Change the downbeat, micro-chop and write a new bass context |
| Chops feel robotic | Everything is hard-quantized and equal velocity | Vary velocity, note length and selected microtiming |
| Sample disappears in the mix | Over-filtering or too many competing mids | Restore its core frequency and carve smaller pockets elsewhere |
| Reverb mud between chops | Long printed tail or shared reverb buildup | Shorten tails, gate the return or automate the send |
| Rights status is unclear | Source or license cannot be verified | Do not release yet; replace, license or seek qualified advice |
Questions producers ask
Music sampling FAQ
What does it mean to sample a song?
It means taking recorded audio from a source and using it inside new music. The sample may be a complete loop, a short chop, a single drum hit, a vocal syllable or an ambient texture.
How do beginners start sampling?
Start with audio you own or are licensed to use. Choose a two- or four-bar phrase, match it to the project BPM, slice it at clear musical points and play a new order on pads or keys. Add drums only after the sample groove feels convincing.
Can I sample any song with an AI stem splitter?
Technically, a stem splitter can process many finished songs. Permission is a separate issue: processing a recording does not grant the right to publish the result. Use audio you are allowed to process and release.
How do I isolate a sample from a finished song?
Upload the song to an AI stem splitter, separate vocals, drums, bass and other instruments, then download the cleanest relevant stem. Import it into your DAW, trim the section and treat it like any other sample.
How long can a sample be legally?
There is no universal safe duration. Copyright analysis depends on the work, the portion used, the purpose, jurisdiction and other facts. Obtain permission or use a source whose license covers your release.
Does pitching or reversing a sample avoid copyright?
No automatic rule says that pitching, reversing, chopping or adding effects removes the rights in the source. Those techniques change the production; they do not themselves provide permission.
What is the easiest DAW for sampling?
The easiest DAW is the one whose slicing workflow you can operate quickly. FL Studio’s Slicex, Ableton Live’s Slice to New MIDI Track and Logic Pro’s Quick Sampler all cover the essential loop, chop, pitch and sequencing tasks.
Should I chop a sample before or after time-stretching?
For most phrase-based samples, establish the source tempo and stretch the main clip first, then chop it. For drum one-shots and micro-chops, slicing first can preserve attacks and avoid unnecessary processing.
How do I make a sampled beat sound original?
Change the musical function: move the downbeat, use shorter chops, alter the sequence, write a new bass line, change the harmony around it, build contrasting arrangement states and preserve only the character you actually need.
Can I release a beat made with royalty-free samples?
Usually only if the specific license permits your intended commercial use and you follow its conditions. “Royalty-free” does not necessarily mean unrestricted, transferable or public domain, so save and read the exact license.
Your first flip starts here
Split the song. Find the moment. Make it move.
Upload a permitted audio file, separate the vocals, drums, bass and instruments, then take the cleanest idea into your DAW and build something the source never did.