
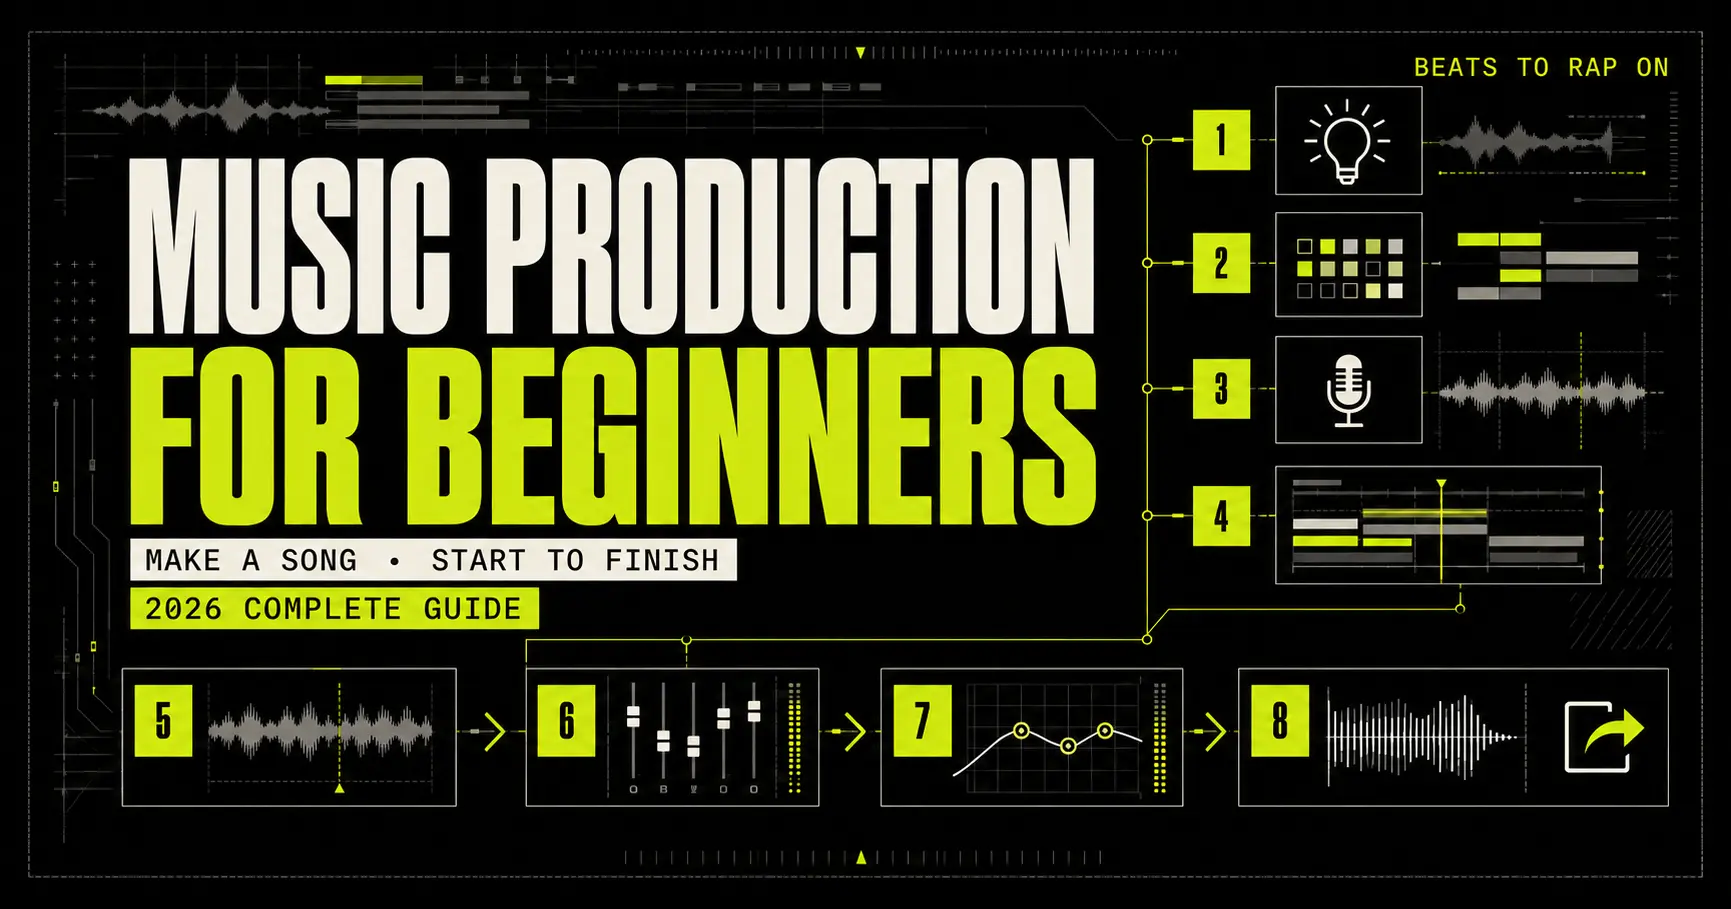
Music Production for Beginners
Learn how to make a song from the first idea to the final master—even if you have no studio, no music degree and no idea what half the buttons in a DAW do.
What is music production?
Music production is the process of turning a musical idea into a finished recording. A producer chooses the sounds, tempo and structure; records or programs the parts; edits the performances; balances the mix; and prepares the final master for release.
You can begin with a computer and headphones. A DAW gives you the deepest control, while browser tools can help you find a song’s key and BPM, separate stems, clean vocals or master a finished mix. The important sequence is idea → production → recording → arrangement → editing → mixing → mastering → export.
One song. Eight jobs.
Beginners often try to write, record, mix and master at the same time. That feels productive, but it forces your brain to make creative and technical decisions simultaneously. Separate the jobs and the whole process becomes easier.
Define the song before opening plugins
Write one sentence that describes the record: “a dark 140 BPM trap song with a close, conversational vocal” is more useful than “make a banger.” Choose one or two reference tracks for energy, density and structure—not to copy their melody. Decide who the listener is, what the hook should make them feel and what has to be finished today.
Choose tempo and key
Tempo controls the grid and the perceived pace. Key controls the note family that normally feels stable together. If you are studying a reference, run it through the BTR Song Key & BPM Finder, then use the result as a starting point—not a law. Half-time and double-time rhythms can make the same BPM feel completely different.
Build the musical core
Start with the part carrying the identity: a drum pocket, chord loop, sample, bass line or vocal phrase. Limit yourself to a small palette. A strong kick, snare, hat, bass and one memorable musical idea will usually teach you more than forty unfocused tracks.
Record the human performance
Capture vocals or live instruments after the groove is stable enough to perform against. Record several full takes, then a few targeted repairs. Keep the best emotional performance even if it needs light editing; perfect timing with no conviction is still a weak record.
Arrange contrast, not clutter
Turn the loop into a journey. Sections should differ in density, register or rhythm. Remove the kick before a hook, mute the bass for two beats, change the drum pattern under the second verse, or introduce a new counter-melody late. The listener notices change more than track count.
Edit before you mix
Choose the best takes, remove unwanted noise, tighten obvious timing problems, create fades and label every track. If the edit still clicks, drifts or changes level unexpectedly, a compressor will not rescue it. Repair the source first.
Mix from balance outward
Pull the faders down, establish the vocal and rhythm-section relationship, then solve specific problems with panning, EQ, compression, saturation, reverb, delay and automation. Plugins are answers to audible problems—not decorations for an empty insert slot.
Master and export
Mastering is the final quality-control and delivery stage. Check tonal balance, loudness, peaks, sequencing and playback translation. Export an uncompressed WAV master and create smaller delivery copies from that master. Never use a low-bitrate MP3 as the source for your final master.
Finish the song before you try to perfect the song.
Buy less. Learn more.
You do not need a commercial studio to learn production. You need a system that lets you hear decisions, capture ideas and reopen the project tomorrow without everything breaking.
Start today
- Computer, tablet or capable phone
- DAW or browser production tool
- Wired headphones
- Stock instruments and effects
- Organized project folder
Capture cleanly
- Audio interface
- Microphone suited to the source
- XLR cable and stand
- Pop filter for vocals
- Closed-back headphones
Hear deeper
- Studio monitors
- Basic acoustic treatment
- MIDI keyboard or pads
- External storage and backup
- Specialist microphones or preamps
Computer: prioritize stability
A modern computer with enough memory and storage can make professional music. The practical bottlenecks are usually project complexity, sample libraries and inefficient plugins—not the brand on the lid. Use an SSD if possible, keep free storage available and freeze or render demanding tracks when the session becomes heavy.
Headphones before monitors
If your room is untreated or you share walls, honest wired headphones are a safer first purchase than large monitors. Bluetooth headphones can add latency and may apply consumer processing; use a cable while recording or making precise timing decisions. Learn one playback system by checking your mixes against familiar commercial records at matched listening volume.
Audio interface and microphone
An interface converts microphone or instrument signals into digital audio and sends audio back to your headphones or monitors. A one- or two-input interface is enough for a solo artist. Choose a microphone based on the source and room: a sensitive condenser can capture detail but also capture the untreated room, while a dynamic microphone often rejects more of the surroundings and can work well in a noisy bedroom.
The first upgrade should remove a bottleneck
Buy a microphone when the phone recording is limiting the song. Buy an interface when latency or noise is stopping clean takes. Buy monitors when your room and schedule let you use them. Do not buy equipment to postpone finishing music.
| Item | Need it now? | What it solves | Do not overspend on |
|---|---|---|---|
| Computer | Yes | Runs the production environment | Flagship specs before projects demand them |
| Wired headphones | Yes | Monitoring, editing and quiet work | Fashion features and heavy bass hype |
| DAW | Usually | Recording, MIDI, arrangement, editing and mixing | Buying several before learning one |
| Interface | When recording | Clean inputs, outputs and lower latency | Many inputs you will not use |
| Microphone | When recording | Captures vocals or instruments | A studio mic that exposes a bad room |
| MIDI controller | Optional | More tactile note and drum input | Keys and pads beyond your workflow |
| Monitors | Later | Speaker-based mix decisions | Large speakers in a small untreated room |
Pick one room. Learn every door.
A digital audio workstation—DAW—is the software environment where you record audio, program MIDI, arrange sections, edit performances, mix tracks and export a finished song.
FL Studio, Ableton Live, Logic Pro, Pro Tools, Cubase, Reaper, Studio One, Bitwig and GarageBand can all make complete records. Their layouts, pricing and strengths differ, but the fundamentals transfer. The best beginner DAW is the one that runs reliably on your device, fits your budget, supports the work you actually do and makes you want to return tomorrow.
You need depth
- You record multiple vocal or instrument takes.
- You want detailed MIDI and audio editing.
- You automate effects and build full arrangements.
- You collaborate using project files or stems.
- You want one environment from sketch to master.
You need speed
- You are testing an idea before opening a session.
- You need one job done immediately.
- You are working away from your main computer.
- You want to analyze tempo or key.
- You need stems, vocal cleanup or a quick master.
Read the BTR 2026 DAW comparison if you need help choosing. Once you choose, finish three songs before reconsidering. Constantly changing software resets your muscle memory and turns product research into a substitute for practice.
Audio is not MIDI
Audio is a recorded waveform. MIDI is performance data: notes, timing, velocity and control messages that tell an instrument what to play. The official MIDI Association describes MIDI as a digital music-description language built around events such as note-on and velocity. That means you can change a MIDI note after recording it, swap the instrument or adjust its timing without time-stretching recorded audio. Learn more from the MIDI Association’s protocol overview.
Build one reusable template
Create a blank project containing labelled drum, bass, music, lead-vocal, background-vocal, effect-return and reference tracks. Add routing but keep processing minimal. Set a default folder for recordings and exports. A template should remove repetitive setup—not force every song through the same sound.
- Name every track before the session becomes crowded.
- Use colors by function: drums, bass, music, vocals and effects.
- Save versions: SongName_01, _02 and _03 instead of “final_final_REAL.”
- Keep audio inside the project folder so the session travels correctly.
- Back up automatically to a second device or cloud location.
Make your first song in 60 minutes.
This exercise is designed to teach the entire production loop. The objective is not a masterpiece. The objective is a complete file you can play from beginning to end.
Set the target
Choose a mood, tempo and reference. Create a new project, set the sample rate, save it immediately and write a one-sentence brief. Decide whether the song will be instrumental or vocal-led.
Build an eight-bar core
Program a basic drum groove. Add one bass line and one chord, sample or melodic part. Do not browse endlessly. Use the first sound that performs its job clearly and replace it only if it blocks the song.
Create a hook
Hum, play or write the most memorable idea. If it is a vocal song, record a scratch hook with any available microphone. If it is instrumental, create a lead motif or rhythmic event that marks the section.
Arrange the timeline
Copy the core into a simple structure: intro, verse, hook, verse, hook and outro. Make each transition obvious by adding or removing elements. Shorten the intro if you find yourself waiting for the record to begin.
Record or commit the lead
Record one complete lead take. If the song is instrumental, print or commit the lead idea and make one variation for the second half. Avoid stopping after every mistake; momentum matters more during the first full pass.
Rough mix
Set levels with the master bus at unity. Pan supporting parts, remove obvious low-frequency clutter and use one shared reverb. Compare briefly with your reference at a similar listening level.
Export and take notes
Export a WAV and a listening copy. Write exactly three improvements for the next session. Close the project. You have now completed the production cycle and earned the right to improve it.
Stuck before the first sound?
Use the BTR online beat-making workflow to sketch drums, tempo and musical direction, then move the promising idea into your DAW for deeper recording and arrangement.
Capture the performance—not the room.
A clear, committed take recorded in a modest setup usually beats an expensive signal chain used badly. Control the environment, position the performer correctly and record with enough headroom.
Prepare the room
Turn off fans, air conditioners and noisy appliances when practical. Move away from windows, bare corners and reflective walls. Soft furnishings can reduce flutter and high-frequency reflections, although they are not a substitute for proper broadband treatment. Record a short test, listen on headphones and adjust the position before performing the full song.
Set input level without chasing the ceiling
Ask the performer to deliver the loudest section. Raise preamp gain until the signal is healthy but peaks remain safely below 0 dBFS. Digital clipping is not desirable vocal color; once the converter overloads, the damage is printed. Modern 24-bit recording provides ample usable range, so you do not need to record near the ceiling.
Use direct monitoring when latency distracts
Latency is the delay between performing a sound and hearing it return through the system. Lower buffer settings reduce delay but increase CPU pressure. Use a small buffer while recording, a larger buffer while mixing, or the interface’s direct-monitoring path if available.
Consistent distance
Place a pop filter between the singer and microphone. Start roughly a hand-span away, then adjust for the voice, mic and room. Moving closer increases proximity effect on directional microphones; moving farther away captures more room.
Full takes first
Record three complete takes before punching individual words. Full performances preserve emotional continuity. Build a comp from the strongest phrases, then record targeted doubles, harmonies and ad-libs.
Record at a practical resolution
For modern music projects, 24-bit WAV at 44.1 kHz or 48 kHz is a sensible starting point. The Library of Congress explains that linear PCM is uncompressed and that higher sample rates and sample sizes can increase fidelity; it also notes 44.1 kHz/16-bit for audio CDs and 48 kHz as a common professional rate. See its linear PCM format description. Keep the same sample rate through the project unless a delivery specification requires conversion.
Clean only what needs cleaning
Use clip gain and fades to control breaths, mouth clicks and room noise before heavy processing. If a strong performance contains fan noise, hiss or room contamination, test the BTR AI Vocal Cleaner. Compare the cleaned and original files at similar loudness. Stop when the distraction is controlled; excessive denoising can remove consonants, air and emotional texture.
Loops create ideas. Contrast creates songs.
An arrangement controls when the listener receives information. The goal is not constant novelty; it is a deliberate pattern of expectation, repetition, surprise and release.
| Section | Primary job | Useful production move | Common beginner mistake |
|---|---|---|---|
| Intro | Establish world and direction | Preview a hook element without revealing everything | Waiting too long for the record to start |
| Verse | Develop story or detail | Leave space around the lead performance | Using the full hook density underneath |
| Pre-hook | Build expectation | Change chords, register, drums or vocal rhythm | Adding volume without changing tension |
| Hook | Deliver the central memory | Widen layers, reinforce rhythm and simplify words | Adding so many parts that the lead disappears |
| Bridge | Reset the ear | Change harmony, texture or perspective | Using a bridge because the template says so |
| Outro | Resolve or deliberately suspend | Remove elements, reprise the hook or create a final turn | Copying the intro without a reason |
Arrange in passes
First place the major sections. Second create transitions. Third remove repeated information. Fourth add automation and small details. Working in passes prevents you from polishing a snare fill while the second verse still has no reason to exist.
Use subtraction as an arrangement tool
Mute the kick for half a bar before the hook. Remove the chords under one line. Let the lead vocal stand alone at the end of a phrase. Silence creates scale because the returning sound feels larger. When a section feels flat, try removing one important element before adding another.
Check the song without looking at the screen
Close your eyes or step away from the timeline. Can you identify each section? Does the energy move? Are transitions musical or merely visual? DAW blocks can make an arrangement look busy while it sounds static.
For rap-specific structures, verse lengths and hook design, use the BTR rap song structure guide.
Repair the source before processing it.
Editing is where you turn raw recordings into reliable material for the mix. Good edits become invisible; bad edits click, change tone or pull attention away from the performance.
Tight, not frozen
Move obvious mistakes and preserve intentional push or drag. Quantize with judgment. If every drum and syllable lands perfectly on the grid, the song may lose its pocket.
Choose emotion first
Build a lead from the strongest complete performance, replacing only weaker phrases. Match breaths and room tone so the comp still feels like one take.
Correct the problem
Fix notes that distract from the melody. Preserve slides, vibrato and transitions unless the style calls for an obvious tuned effect.
Every audio cut needs a boundary check
Listen at the edit point, add short fades and check for missing consonants or chopped reverb tails. Crossfades blend overlapping regions; small fade-ins and fade-outs prevent discontinuities from clicking. Edit on headphones, then verify in context.
Consolidate only after you are confident
Keep a hidden playlist or duplicate before destructive edits. Once the vocal comp, timing and fades are correct, consolidate the region from a shared start point. That makes collaboration and stem export much safer.
Balance is the mix.
Mixing turns many recorded elements into one convincing performance. Start with faders and arrangement. Use processing only when you can state what you are trying to change.
Static balance
Set the lead element first, then build drums, bass and music around it. Listen quietly; level problems are often easier to identify at low volume. If the chorus does not feel bigger, change the arrangement or automation before reaching for a limiter.
Panning and width
Keep critical low-frequency information and the lead vocal anchored unless the production calls for movement. Pan supporting instruments to create separation. Check mono because width effects, doubled sounds and layered samples can partially cancel when channels combine.
Equalization
Use EQ to remove unwanted buildup, control resonances or emphasize a useful quality. Make moves in context. A soloed instrument can sound thin but fit perfectly once the vocal and bass return.
Compression
Compression changes level over time. Use it to control inconsistent dynamics, shape attack and sustain or create rhythmic movement. Adjust threshold, ratio, attack and release while listening to the musical result—not while chasing generic settings.
Depth and effects
Reverb suggests a space; delay creates repeats; saturation adds harmonics. Shared effect sends can place different elements in a related environment. Use pre-delay, filtering and automation so the effect supports the lead instead of covering it.
Automation
Ride vocal phrases, lift transitions, control effect throws and reshape section energy. A fixed plugin setting cannot understand every word or section; automation is how the mix follows the song.
Gain staging without mythology
Keep signals away from clipping and leave enough headroom for processing. There is no single magical peak value for every track. What matters is that individual channels, buses and the master are behaving predictably, analog-modelled plugins receive reasonable levels, and the mix bus is not accidentally overloaded.
Use references at matched loudness
Import one or two relevant commercial tracks. Turn them down until they feel similar in loudness to your mix; otherwise the louder file will often appear more exciting. Compare vocal position, bass weight, brightness, width and section contrast. Do not try to copy a mastered waveform with an unfinished mix.
- Can you understand the lead at low listening volume?
- Do the kick and bass feel intentional rather than merely loud?
- Does the hook change the energy?
- Does the mix still work in mono?
- Are any reverbs or delays masking consonants?
- Does the mix translate to phone, earbuds, headphones and speakers?
Final polish. Final responsibility.
Mastering cannot repair a poor arrangement or an unbalanced vocal. It can refine tonal balance, control peaks, shape dynamics, set delivery level and verify that the finished file behaves correctly across playback systems.
Prepare the premaster
Export the mix from the beginning of the timeline to the intended end, including natural reverb tails. Use an uncompressed WAV at the project’s native sample rate and bit depth. Bypass any loudness processing added only for client preview, but keep intentional mix-bus processing that is part of the sound. Check for clicks, clipping, muted effects and wrong versions before mastering.
Loudness is measured, not guessed
LUFS-based meters estimate perceived programme loudness, while true-peak measurement estimates peaks that can occur between digital samples. The current ITU-R BS.1770-5 recommendation defines the measurement algorithms used for programme loudness and true-peak level. It does not declare one universal artistic target for every song.
Do not master to a number without listening. Genre, arrangement, distortion, transient shape and dynamic intent all affect how loud a record can become before it sounds smaller. Compare at matched loudness, then choose the version with better impact and translation.
Keep the best source
- Uncompressed WAV
- Native sample rate
- 24-bit when appropriate
- Correct metadata and version name
- No accidental clipping
Derive from the master
- High-quality MP3 or AAC
- Used for quick sharing and review
- Never used as the next mastering source
- Checked after encoding
- Clearly named to prevent upload errors
If you do not have a treated room or a reliable mastering chain, upload the premaster to BTR AI Mastering, compare the original and mastered versions, and test the result on several playback systems. Treat automated mastering as a fast final-stage assistant, not permission to skip the mix.
The five terms that stop beginners cold.
Snapshots per second
Sample rate describes how often an analog signal is measured during digital conversion. Use the project and delivery rate consistently; switching rates carelessly can change speed, pitch or quality.
Amplitude resolution
Bit depth affects the available digital dynamic range and quantization resolution. Recording at 24-bit gives useful working headroom, but it does not rescue clipping at the microphone or converter.
Latency versus stability
Smaller buffers reduce monitoring delay but make the computer work harder. Larger buffers improve stability during dense mixing sessions. Change the buffer for the job.
One channel versus two
A mono source uses one channel. Stereo uses two channels to carry left-right information. A mono vocal can sit inside a stereo mix; duplicating it does not automatically create real width.
Master versus delivery copy
WAV commonly stores uncompressed PCM audio. MP3 uses lossy compression to reduce file size. Record, edit and master with uncompressed files; create compressed copies afterward.
Room before the ceiling
Headroom is the level available before a signal reaches its maximum. It keeps recording and processing predictable. It is not a single compulsory number for every session.
Automate friction. Keep judgment.
AI is most useful when it accelerates a defined task. It is least useful when you ask it to replace the artistic decision you have not made.
| Production problem | Useful AI task | Human decision that remains | BTR route |
|---|---|---|---|
| You cannot identify a reference track’s tempo or key | Analyze BPM and tonal center | Choose whether that tempo and key fit your song | Key & BPM Finder |
| You need to study or rebuild parts of a mixed song | Separate vocals, drums, bass and instruments | Evaluate artifacts and use the audio lawfully | AI Stem Splitter |
| A strong vocal take contains noise or room contamination | Reduce hiss, background noise and roughness | Decide when cleanup begins harming tone | AI Vocal Cleaner |
| The final mix needs fast quality control and polish | Analyze balance and apply mastering-style processing | Approve the result through comparison and translation checks | AI Mastering |
Use separated stems as information—not magic
Source separation estimates the parts inside a finished mix. Results vary with arrangement density, distortion, shared frequencies and ambience. Preview the hardest section before committing, and expect to use fades, editing, EQ or masking around residual bleed. If you are separating audio you did not create, technical access does not grant release rights.
Keep an A/B path
Duplicate the original before AI processing. Match loudness when comparing. Listen for consonant loss, high-frequency smearing, transient softness, pumping and phase change. The processed version is only better if it improves the song in context.
Ten ways beginners make production harder.
Starting with plugin shopping
Stock tools can teach level, EQ, compression, reverb, delay and automation. Learn the job before buying another version of the job.
Mixing an unfinished arrangement
If three parts compete constantly, mute or rewrite one before carving all three with aggressive EQ.
Producing too loud
Long sessions at high volume fatigue hearing and distort judgment. Work quietly, take breaks and use brief louder checks.
Watching meters instead of listening
Meters answer defined questions. They cannot decide whether the hook lands emotionally or the groove feels late in the right way.
Recording into clipping
Leave headroom at the source. Turning a distorted file down later does not restore the clipped waveform.
Using reverb to hide weak vocals
Edit timing, choose the right take and control level first. Reverb magnifies problems as effectively as it creates space.
Never committing
Unlimited options create unfinished sessions. Print the sound when it expresses the idea and keep moving.
No file discipline
Missing samples, overwritten sessions and unnamed exports destroy more progress than imperfect EQ.
Mastering the limiter instead of the mix
If loudness makes the kick collapse or the vocal become harsh, return to the mix rather than pushing harder.
Never finishing
A finished weak song teaches arrangement, export and review. A perfect eight-bar loop teaches only looping.
Thirty days to a repeatable workflow.
Do not spend a month “learning production” as an abstract subject. Complete small outputs under constraints and review the result.
Navigation
Learn the DAW, build four eight-bar ideas, practice saving, routing, MIDI, audio import and export. Finish one 60-minute song.
Arrangement
Turn two loops into full timelines. Rebuild the section map of reference tracks and practice transitions through subtraction.
Recording
Record full takes, comp a performance, edit timing, add fades and clean noise. Deliver one organized vocal session.
Finish
Mix two songs, master one, export archive and listening files, test on four playback systems and write the next-step notes.
The daily 45-minute session
- Five minutes: state the output and open the correct version.
- Thirty minutes: work on one production stage without browsing tutorials.
- Five minutes: export a dated listening copy.
- Five minutes: write the single next action for tomorrow.
At the end of the month, measure completed songs, completed sections and solved problems—not hours watched. Education becomes skill only after repeated decisions inside real projects.
Production access is not release permission.
Keep a record of who wrote, performed and produced the song, which samples or loops were used, and what each contributor agreed to before the track is released.
In the United States, the musical composition and the sound recording are legally distinct works. The U.S. Copyright Office explains that the composition covers music and lyrics, while the sound recording is the fixed recorded performance; ownership of one is not a substitute for ownership of the other. Read the Office’s musical compositions and sound recordings guidance. Rules vary by country and agreement, so obtain qualified advice for an important release.
- Write down composition splits and contributor names.
- Confirm the licence for every sample, loop and beat.
- Keep invoices, licence files and written permissions with the project.
- Credit performers, producers and engineers accurately.
- Do not assume an AI extraction, remix or cleanup changes ownership.
Music production FAQ.
Can I learn music production with no experience?
Yes. Begin by completing simple songs with a limited set of sounds. Learn one DAW, practice the eight-stage workflow and add technical knowledge when a real project creates the need. You do not need to master music theory or audio engineering before starting.
What equipment does a beginner music producer need?
A computer or capable mobile device, production software and wired headphones are enough to begin. Add an audio interface and microphone when recording vocals or instruments. Add monitors and acoustic treatment when your room and workflow justify them.
Which DAW is best for beginners?
The best DAW is compatible with your device, budget and intended workflow. GarageBand can be an accessible entry point on Apple devices; FL Studio is popular for pattern-based beatmaking; Ableton Live emphasizes flexible creation and performance; Logic Pro offers a broad Mac production environment; Reaper is lightweight and customizable. Any major DAW can make a professional song.
Do I need music theory to produce music?
No, but basic rhythm, scales, chord construction and song form can make ideas faster to develop and easier to communicate. Learn theory alongside production by applying one concept to a real song rather than postponing creation until you know everything.
How long does it take to learn music production?
You can learn the basic workflow in days and complete a first song in an hour. Developing reliable judgment takes repeated projects over months and years. Progress is faster when you finish songs, compare them with references, identify one weakness and deliberately address it in the next project.
Can I produce music on a phone?
Yes. Mobile DAWs and browser tools can record, program, arrange and export serious ideas. A computer becomes helpful when projects require detailed editing, many tracks, large instrument libraries, third-party plugins or complex mixing, but the musical fundamentals remain the same.
What is the difference between producing and mixing?
Production decides what the record is: sounds, performances, tempo, key and arrangement. Mixing balances and processes those elements into a coherent stereo or immersive presentation. The roles overlap, especially for self-producing artists, but separating the stages improves decision-making.
What is the difference between mixing and mastering?
Mixing works with the individual tracks and buses inside a song. Mastering works with the completed mix or release sequence, applying final quality control, tonal and dynamic refinement, loudness management and delivery preparation.
Should beginners use loops and samples?
Yes, provided the licence permits the intended use. Loops can teach arrangement, layering and sound selection. Do not mistake stacking premade loops for learning every production skill; also practice programming, recording, editing and transforming material into a distinct song.
Should I record at 44.1 kHz or 48 kHz?
Either can support professional music. Use the rate required by your main delivery environment and keep it consistent through the project. 44.1 kHz remains common in music workflows; 48 kHz is common in video and many professional audio workflows.
How loud should my mix be before mastering?
There is no universal compulsory peak or LUFS value for every premaster. Avoid clipping, leave enough headroom for the mastering process and deliver an uncompressed file at the native project format. A mastering engineer or service may provide specific requirements.
Can AI make me a better music producer?
AI can accelerate analysis, separation, cleanup and mastering, but improvement comes from the decisions you make with the result. Use AI to remove friction, compare versions and reveal options while retaining control of arrangement, performance, taste and final approval.
Make the record. Then make the next one better.
Analyze the reference, build the idea, record the performance, finish the mix and use BTR’s production tools when a specific job is slowing you down.